Choose a Store
- Shop All
- Replacement Parts
- Performance Parts
- Accessories
- Oil & Fluids
- Special Offers
- Advance Rewards
- Advice & How-Tos
- Project Guides
Share
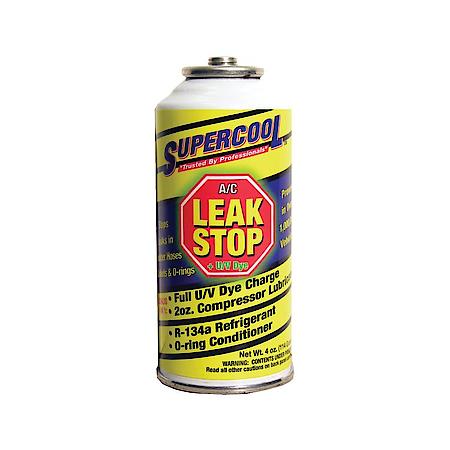
Supercool Leak Stop With Uv Leak Detection Dye 4 Oz. Stops Leaks In Rubber Components.
30 day replacement if defective
How Would You Like To Get This Item?
Store Pickup
Same Day Home Delivery
Home Delivery
Product Information
Product Details
Part No. STOPA
Warranty Details (30 DAY REPLACEMENT IF DEFECTIVE)
TSI Supercool is a Quality and Solution driven ISO 9001 Certified Manufacturer of Specialty Lubricants for industrial and automotive markets worldwide. Our biodegradable lubricants puts us on the forefront of responsible manufacturing.
Product Features:
Product Features:
- Does not contain polymers. Will not harm A/C system components, compressor seals or bearings, will not harm or contaminate reclamation/recovery machines
- Stops refrigerant leaks on rubber hoses, gaskets, seals and All types of O-rings including HNBR, Nitril and Neoprine
- Contains 2 oz. of R134a refrigerant
- Compatible with PAG, ester, and mineral oils
- 4 oz. can treats 1 vehicle
- Charges into air conditioning system with standard R134a can tap
4.1 out of 5
10 Customer Reviews
50% of respondents would recommend this to a friend
Ratings Distribution
5 Stars
6
4 Stars
1
3 Stars
1
2 Stars
2
1 Star
0
Pros
1
Maybe It Stops Small Leak
1
(null)
Cons
6
No
2
Yes
1
Dye Is Not Detected
1
(null)
Most Liked Positive Review
leak stop with uv dye
hook the hose to the low side and then turn the a/c on max. do what is written on the can turning the can from 12 o'clock to 3 o'clock it empties quickly. after the can is empty disconnect the hose and remember to screw the cap back on the a/c system.i let my a/c run on high for about 5 minutes. i then turned the truck off. after the truck was turned off i then used a little flash light that was a black light and started to shine the black light on any hose that had to do with the a/c checking where the lines connect to the drier and moving to the front of the truck making sure i checked where the rubber hose is crimped to the metal part of the hose. i found my leak very quick, it was at the point where the rubber hose and the metal line was crimped remember to check the whole system because there may be more than one leak. i am replacing the hose to fix the leak i don't know if the leak detector would repair the leak so i will replace the hose to make sure the leak is fixed. then vacuum the system and add the right amount of r134a or r12 if it is an older truck or car remember the laws about working on a/c units. to find the leak from start to finish it took me about 20 minutes and saved me a lot of money taking it to a shop. worked great
Most Liked Negative Review
Would buy this product again if another leak were to develop
The leak was behind the compressor clutch and it could be heard, not seen. Replacing the compressor resolved the problem.
No results
Feedback
Be The First To Know About Deals And Promotions.
Plus, create an account to receive $5 off of $20 or more.